
Openfiler is a network storage operating system which has the excellent integration capabilities for virtualization environment. To configure Openfiler in you VMware environment you can follow the below steps:
- Download Openfiler ISO image from https://www.openfiler.com/community/download
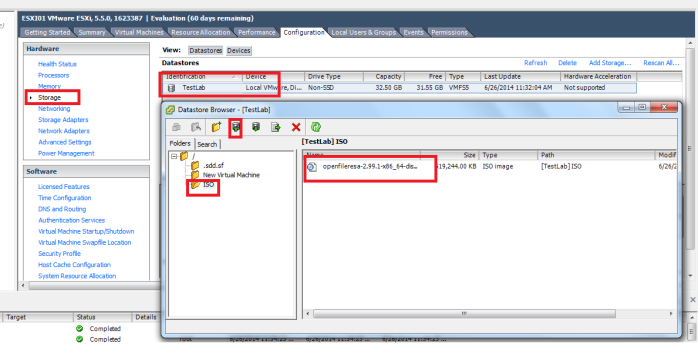
- Upload the ISO to you datastore
- Create a new VM in your esxi host
- In the configuration window select typical
- Enter the name of this new VM and click next
- Select the storage destination of your VM and click next
- From Guest operating system list select Linux, Version – Other Linux 64-bit and click next
- Accept the default network configuration and click next
- For test purpose select the disk size to 20 GB and click next
- Check Edit virtual machine settings before configuration and click Continue
- Assign memory to 1GB
- Click on CD/DVD drive, select Datastore ISO file and click on Browse, select the ISO
- From the device status check Connect at power on
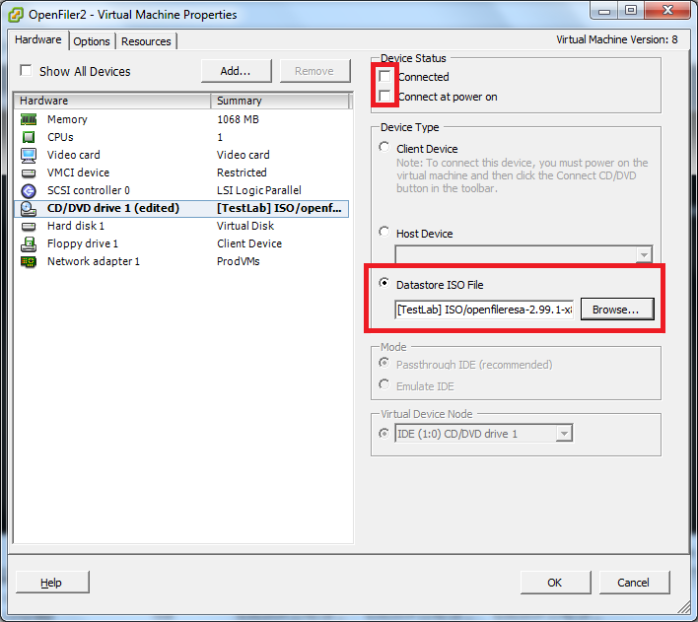
- Click Ok
- Now you can see a new VM has been created in your ESXI
- Select the VM and from the getting started page click on Power on the Virtual Machine
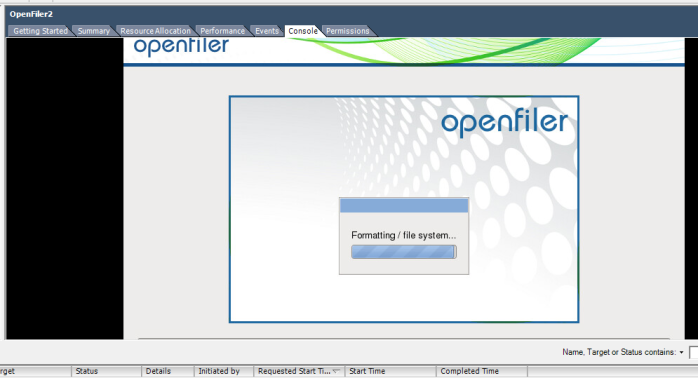
- Click on Console tab of you VM to complete the installation
- On the Openfiler installation wizard, click next
- Select the Language settings and click next
- Click Yes on the warning dialog box
- In the drive selection page accept the default settings and click next
- Click yes on the warning page
- Assign an IP or use DHCP for the time being
- Select the time zone and click next
- Assign a password and click next
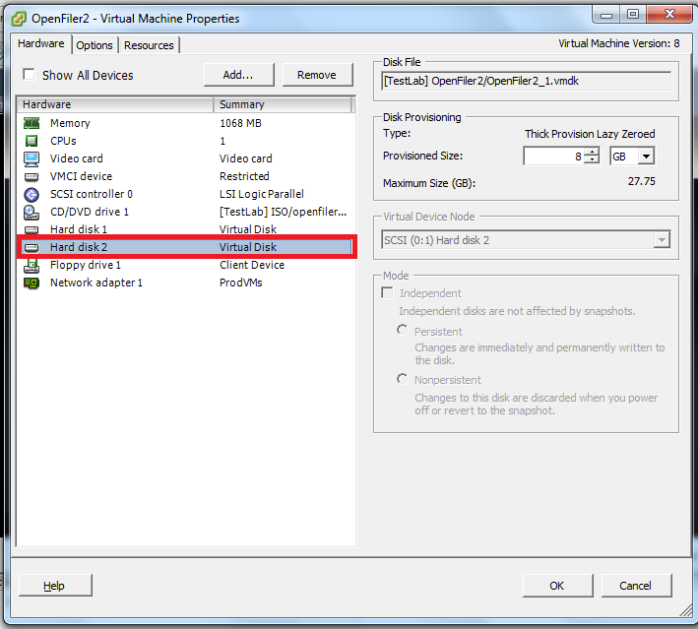
- Reboot the system, right click on Openfiler VM and click edit settings
- Add a new Hard disk, this disk will be used as your storage
- After rebooting the system will provide you a web URL
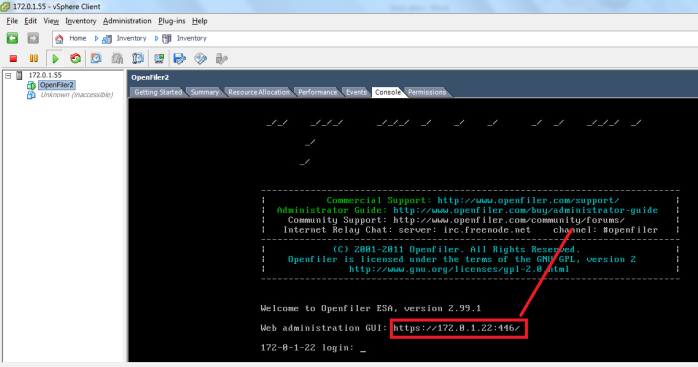
- Open a web browser and enter that URL
- The default user name and password is openfiler/password
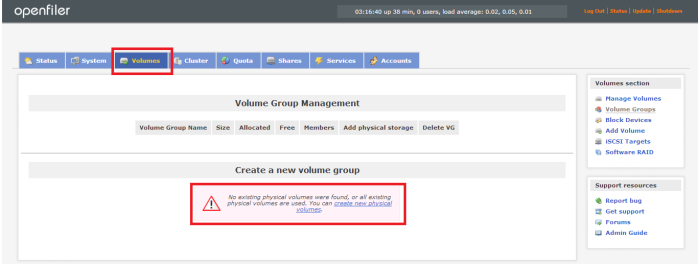
- Click on the Volumes tab and click on create new physical volume
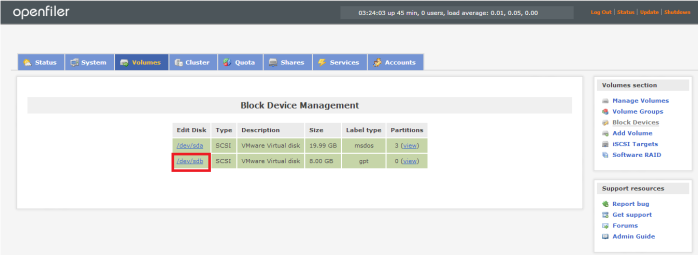
- Click the URL under edit disk column (the new disk that you have create as VM hard disk)
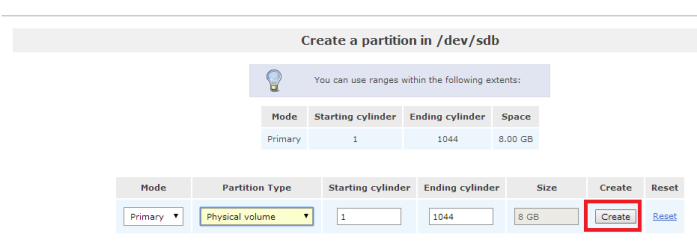
- Select Mode as Primary, Partition Type as Physical Volume. Click on create button
- Click on Volume Groups link from the right side of the page
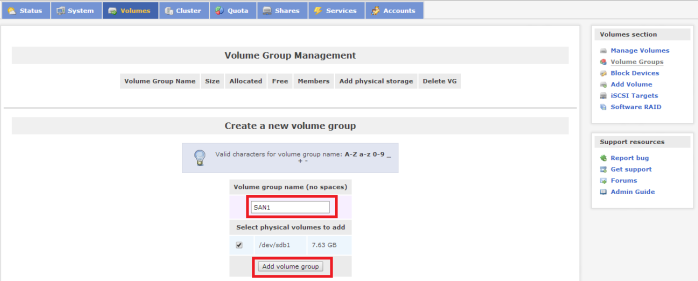
- Give a name of your volume group and select the physical volume and click on Add volume group button
- Click Add volume link
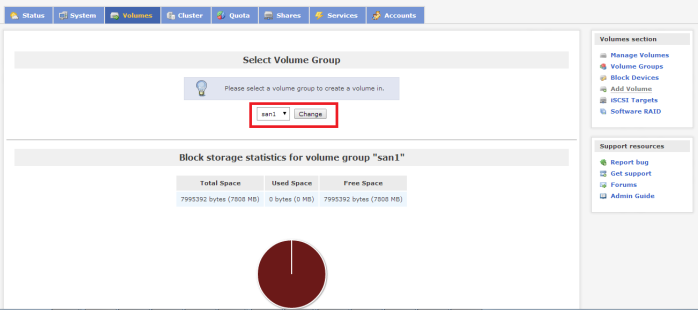
- From the Drop down select the volume group you have created and click on Change button
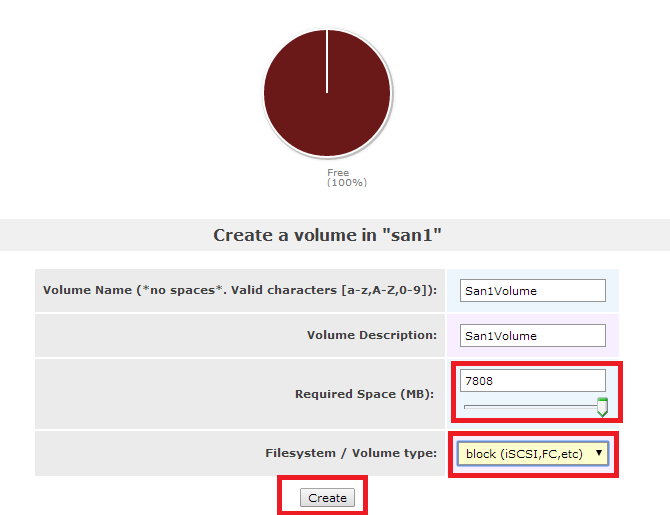
- Create a new volume, select block(iSCSI, FC, etc) as File System, click on Create
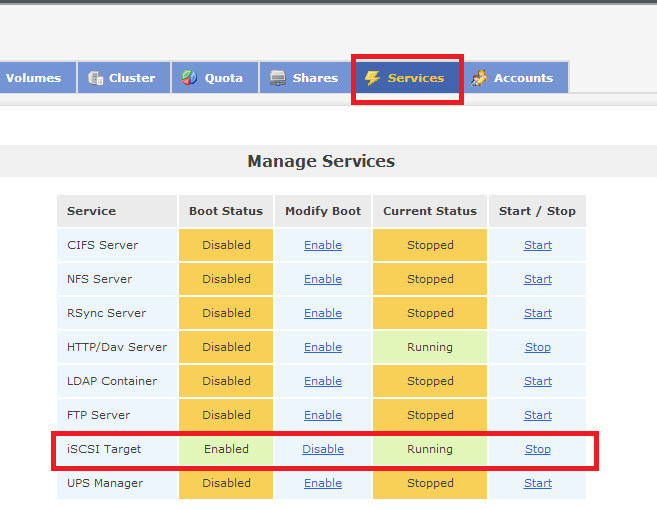
- Click on Services tab and enable iSCSI target, start the service
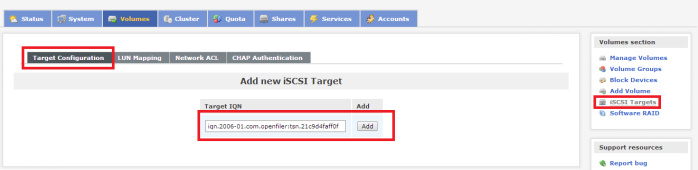
- Click on Volume Tab, then click on iSCSI targets link from the right side of the page
- Accept the default target name and click on Add
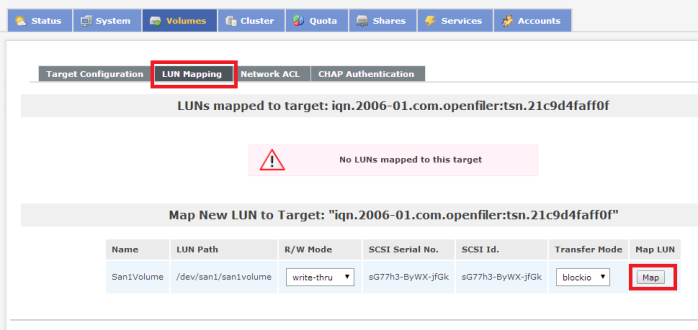
- Click on LUN Mapping tab
- From R/W Mode drop down select write-thru and click on Map button
Configure iSCSI target in ESXI
- Select the ESXI server from you vSphere client
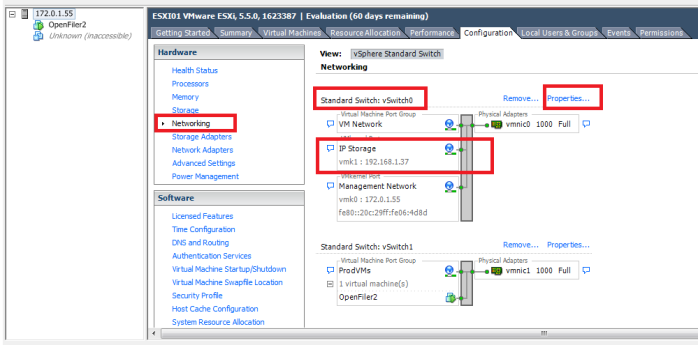
- From the configuration tab goto Networking
- Click Properties on vSwitch0
- Click on Add
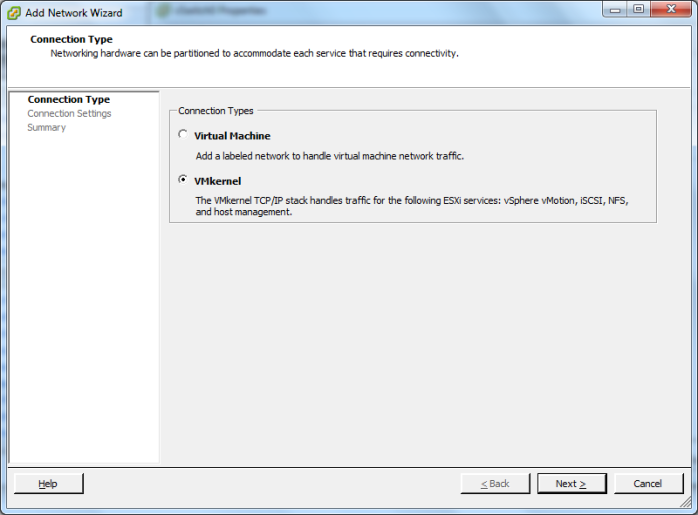
- Select VMKernel as connection type
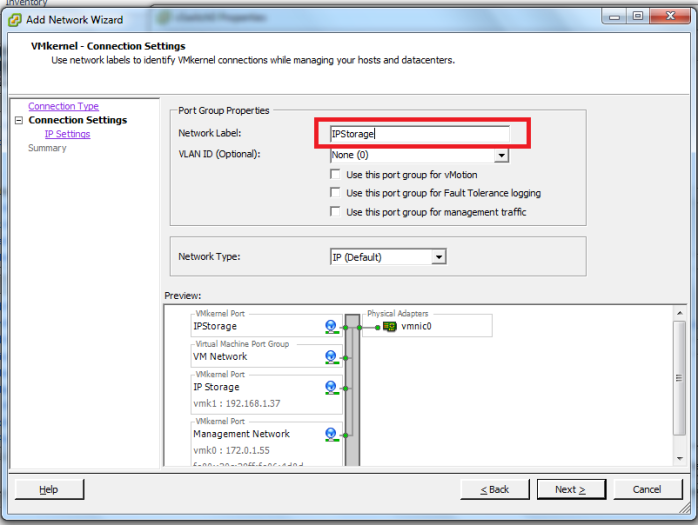
- Assign a name – like IP Storage
- Uncheck all check boxes and click next
- Assign an IP or use DHCP
- Click next and finish
- Go to storage adapter link and click on Add
- Select iSCSI and click ok
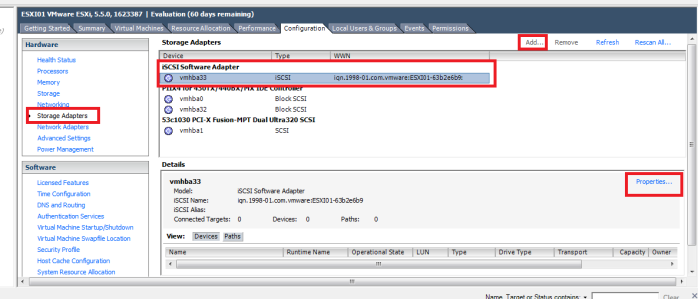
- Select the iSCSI software adapter device and click on Properties
- In the iSCSI initiator properties click on Dynamic discovery tab and click Add
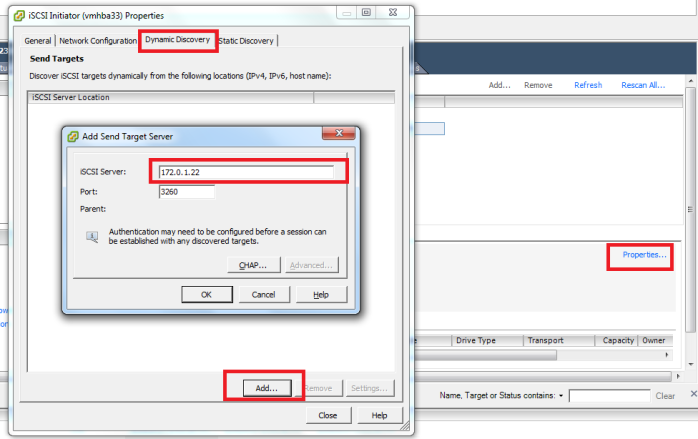
- Enter the IP address of your openfiler server as iSCSI server and click OK
- Click Close
- In the Rescan alert message, click Yes. After few seconds you will see that openfiler disk has been mounted

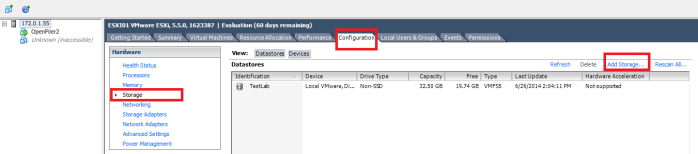
- Click on Storage
- Click on add storage link
- Select Disk/LUN as storage type
- Select the storage that you have mounted earlier
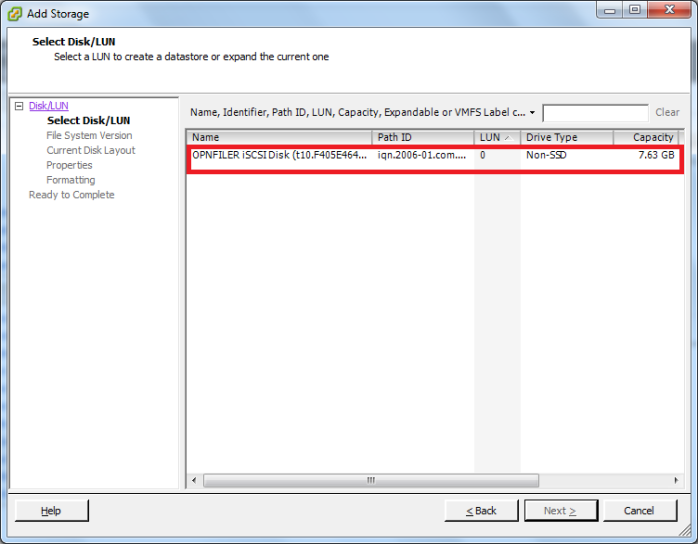
- In the file system version window select VMFS-5
- Click next
- Assign a name of this datastore
- Select Maximum capacity and click next
- Click Finish
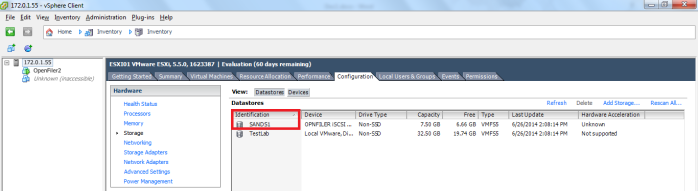
Your Openfiler storage is ready to use!!
