To configure VPC follow the below steps:
- Login to AWS console
- From services select VPC
- From VPC Dashboard click on Start VPC Wizard
- Click on VPC with Public and Private subnets – (assuming that you network will have internet access as well) and click on Select button

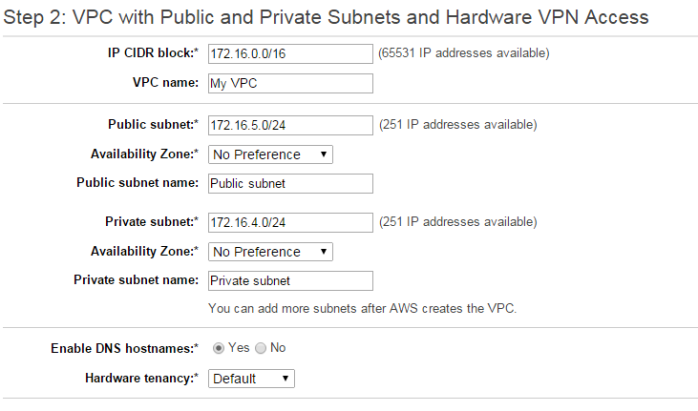
- Enter configuration details as below (assuming your network will be 172.16.4.0/24)
- Click Next
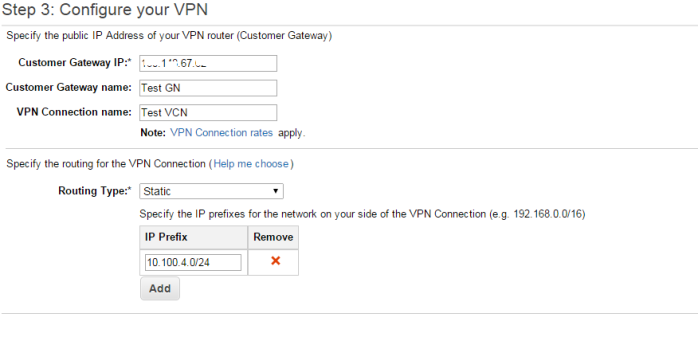
- Enter IP firewall outside IP, enter name for gateway and VPN
- Select routing type as static
- Enter your office network IP prefix
- Assuming that you AWS Private subnet will be: 172.16.4.0/24
- Click on Create VPC
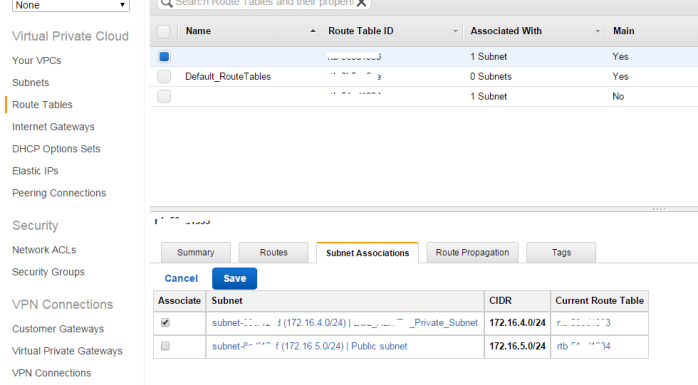
- After you see the successful creation of you VPC, go to route tables
- Select the correct route table from the list (associated with 2 subnet)
- Click on subnet Associations tab
- Click on Edit
- Select your subnet and click save button
- Go to VPN connection link, select your VPN and click on download configuration
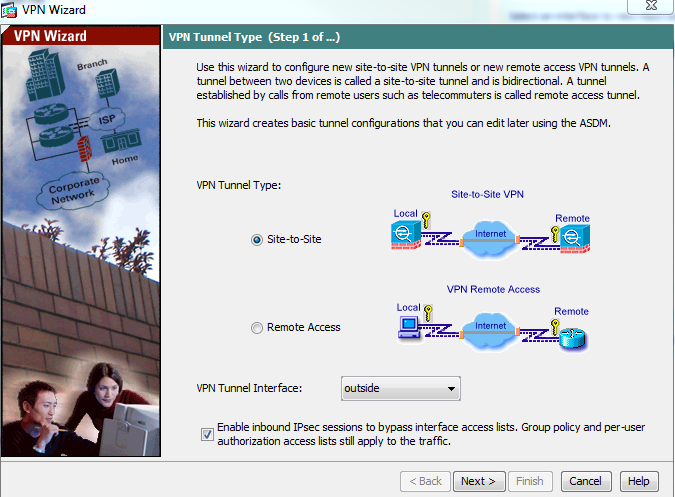
- Open you CISCO ASA firewall
- Click on Wizard –> IPSec VPN wizard
- Select site-to-site VPN, VPN tunnel interface as outside and click next
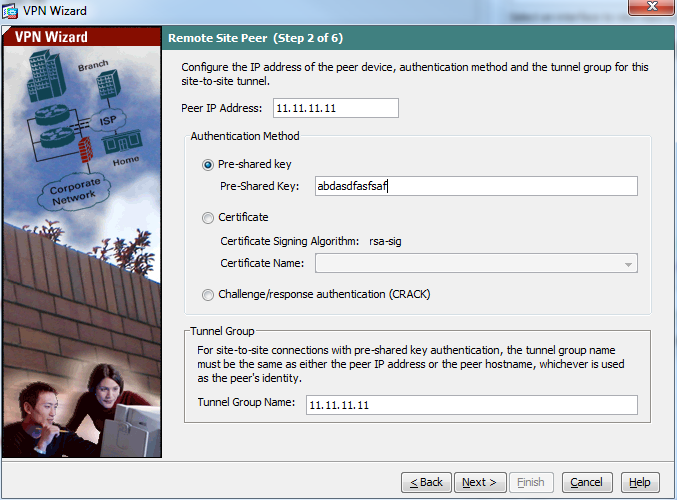
- Enter the IP address that you have in the downloaded file – as tunnel-group
- Enter the pre-shared-key that they have provided

- Click next
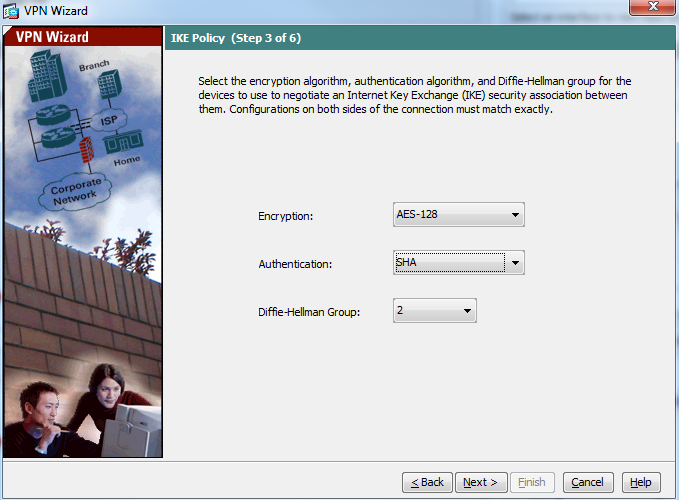
- Select the configuration as below
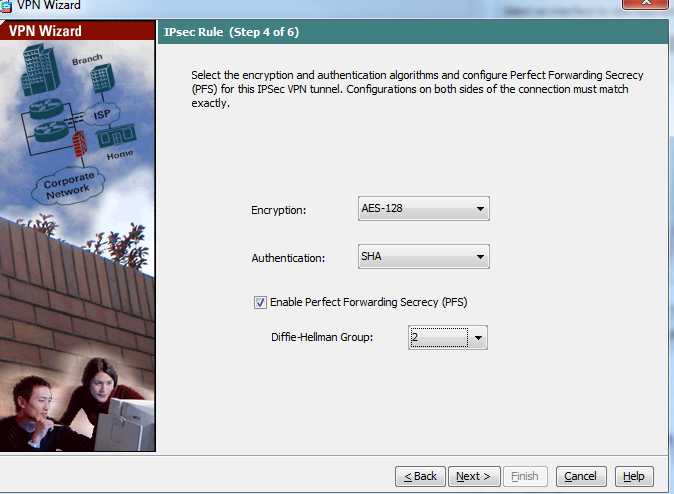
- Select the configuration as below
- Enter the remote network configuration as below

- Click next and click finish
- Follow the same step to configure second tunnel-group that you have on that VPN text file
- Promote a EC2 instance with your newly create VPC
- Note the private IP address that is automatically assigned to your new instance
- Open CLI of you CISCO ASA device, we need to configure SLA monitoring as AWS bring the VPN connection down if it does not see the network traffic on the tunnel. To keep the VPN connection alive all the time we need to configure SLA monitoring in our CISCO device
- Enter the below command
- ciscoasa# config t
ciscoasa(config)# sla monitor 1
ciscoasa(config-sla-monitor)# type echo protocol ipIcmpEcho 172.16.8.4 interface outside
ciscoasa(config-sla-monitor-echo)# frequency 5
ciscoasa(config-sla-monitor-echo)# exit
ciscoasa(config)# sla monitor schedule 1 life forever start-time now
ciscoasa(config)# icmp permit any outside - Now you need to configure your VPC to accept ICMP connection from internet or your firewall outside IP. To configure this
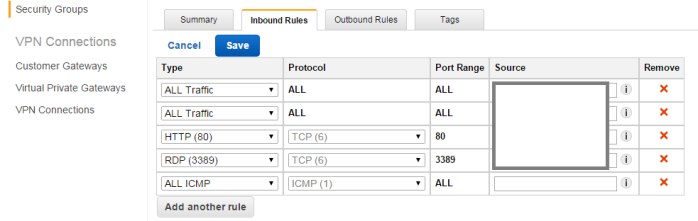
- Go to VPC –> Security group
- Select the security group that is associated with the instance you have created earlier
- Click on Inbound rules tab
- Click on Edit
- Select ALL ICMP and enter you firewall outside interface IP as source
- Click Save
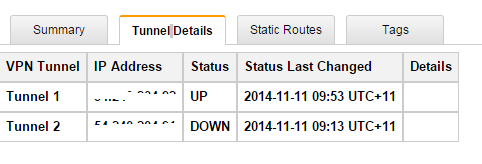
- Click on VPN connections link
- Select your VPN and click on tunnel tab
- You should see at least one VPN tunnel status is UP (In AWS you can’t make two tunnel up at the same time)