How to import on-premises ORACLE data to ORACLE RDS, few simple steps!!

Importing data to ORACLE RDS will be a complex job if you are doing it for the first time. You can follow the below simple steps to do that.

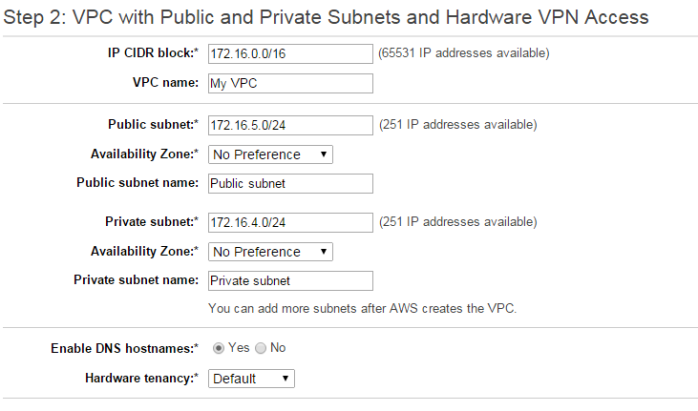
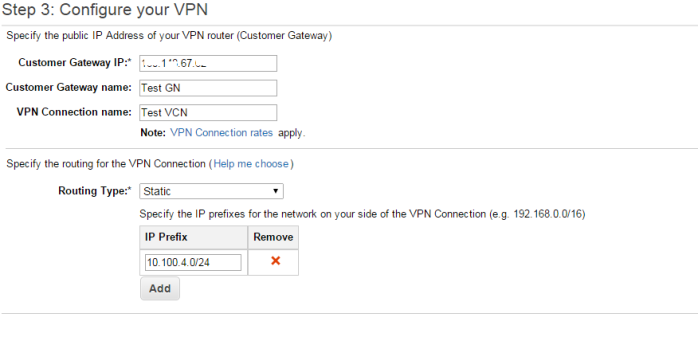
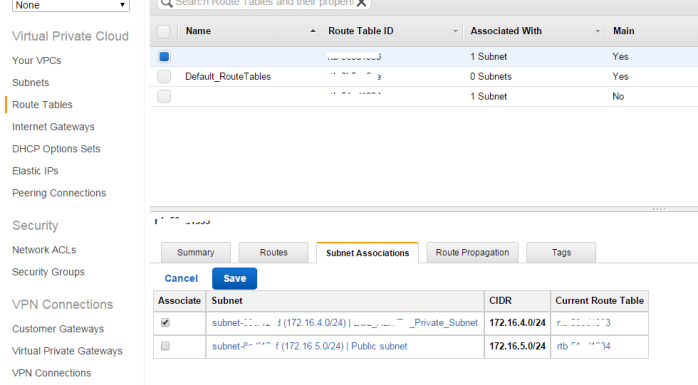
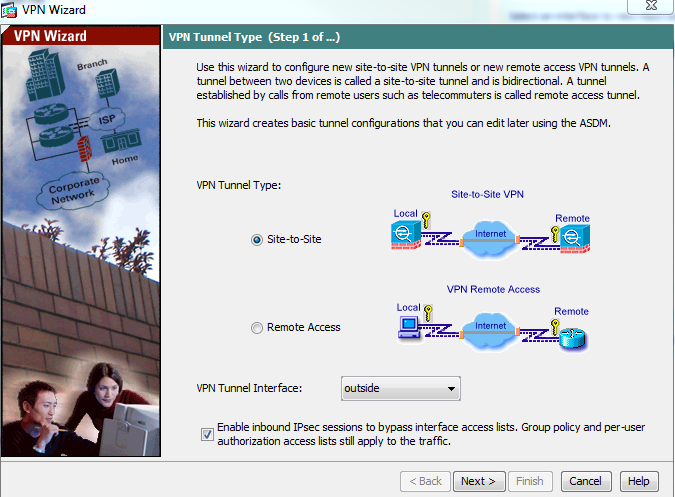
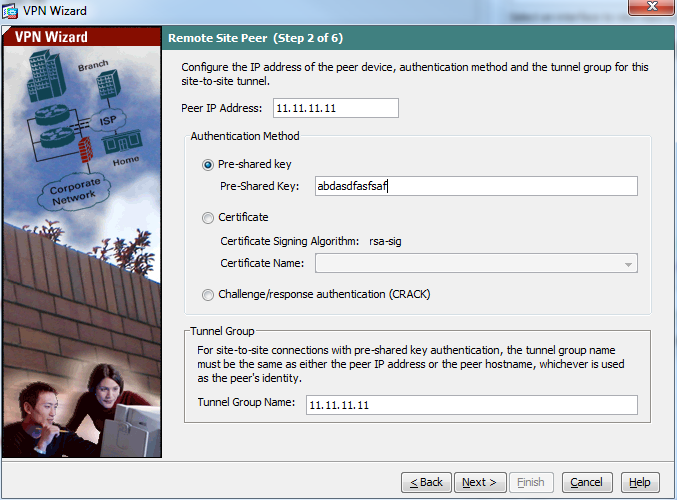
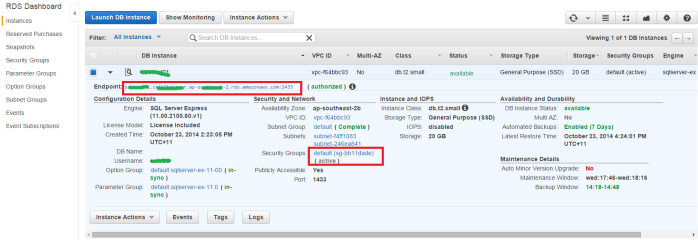
  • Create an ORACLE RDS DB instance from AWS management console
  • Go to your source database and create a DBlink as below
    create database link UR_DB_LINK_NAME connect to UR_RDS_USER_ID identified by UR_RDS_PASSWORD
    using ‘(DESCRIPTION=(ADDRESS=(PROTOCOL=TCP)(HOST=UR_IP_RDS_IP_OR_DNS)(PORT=1521))(CONNECT_DATA=(SID=UR_RDS_SID)))’;
  • Connect to your local ORACLE DB using Oracle SQL Developer
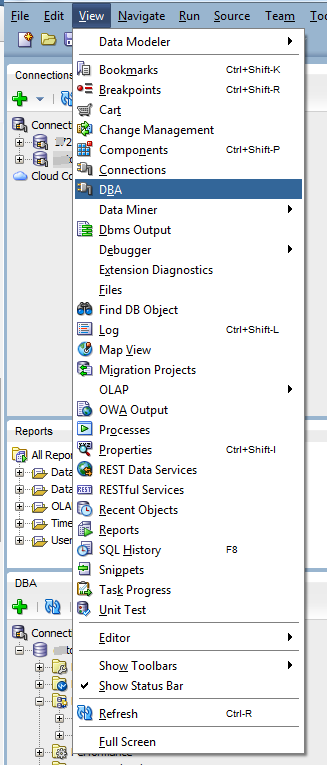
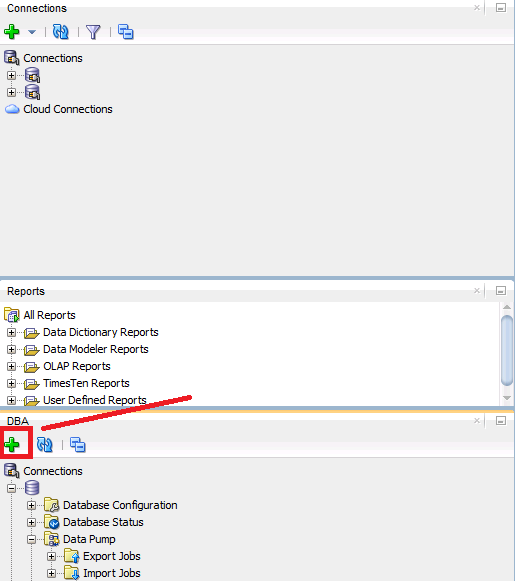
  • Click on View menu –> DBA to view the DBA portion to use data pump
  • Connect with your source DB with a DBA user
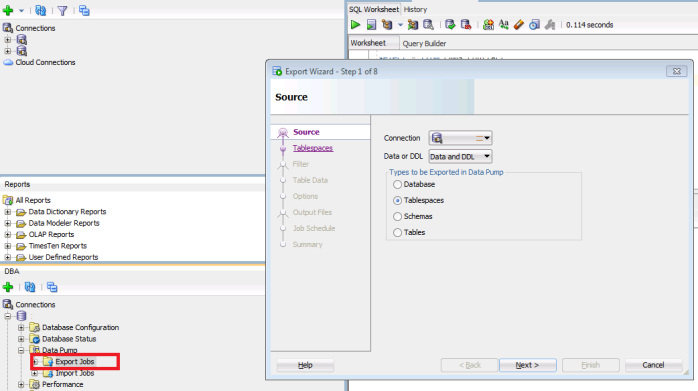
  • Expand the data connection –> right click on Export Job and Click on Data pump export wizard
  • Select the Tablespaces you want to export and export that to a .dmp file
  • Transfer the .dmp file to your RDS by using the below script. Run this script from your source DB’s SQL window

BEGIN
DBMS_FILE_TRANSFER.PUT_FILE(
source_directory_object => ‘UR_SOURCE_DIRECTORY‘,
source_file_name => ‘UR_EXPORT_FILE_NAME.dmp’,
destination_directory_object => ‘DATA_PUMP_DIR’,
destination_file_name => ‘UR_IMPORT_FILE_NAME.dmp’,
destination_database => ‘UR_DB_LINK_NAME
);
END;
/

  • It will take some time to export this to RDS – based on your file size and network speed
  • After successful transfer, connect with the RDS from Oracle SQL developer
  • Add the DBA connection with RDS to initiate data pump wizard
  • A tricky part – create tablespace in your RDS with the same name as it was before. It will help you to automatically export those schema, otherwise you will need some manual work map exported tables to you existing RDS tablespace. Use the below script to create those tablespaces:

create tablespace YOUR_SOURCE_TABLESPACE_NAME_DATA
create tablespace YOUR_SOURCE_TABLESPACE_NAME_INDEX

  • Use the Data pump import wizard and select the file which you have imported earlier
  • Your RDS is ready for service!!

AWS Multi-factor authentication with Google Authenticator

Running infrastructure in the cloud means, you are allowing everybody to sniff your core as long as you are not implementing enough security measure. Now a days it is very easy to look into/modify your hosted service from any corner of the world – like someone from my small village in Bangladesh may sniff your cloud datacentre hosted in Sydney with his Chinese smartphone having a 2G network. What if your root account details has been compromised, it will be a disaster for you.

To tighten the security in AWS cloud there are few security measures you can follow:

  • Do not store your access key in AMI, instead use IAM role for allowing a machine to use a particular service
  • Periodically renew your access key
  • Enable multi-factor authentication for all users

Enabling multi-factor authentication for root user

  • After login to your AWS console, click on your user name and click security credential
  • Click Multi-Factor Authentication
  • Assuming that you have a smart mobile. I am using my android device to do that
  • Install Google Authenticator on your Android device
  • From your AWS console select A virtual MFA device
  • Click on Next step twice
  • Open the Google authenticator on your mobile
  • Scan QR Code with Google authenticator which is showing in your AWS console
  • After scanning the QR codes your mobile device will show you two authentication codes
  • Enter both code in Manage MFA device wizard
  • Click next step and click finish
  • Logoff from AWS console
  • Try to login again. The system will ask you for MFA token. Open google authenticator from your mobile device and enter that code and login

Step by step – site-to-site VPN with AWS VPC and CISCO ASA 5505

To configure VPC follow the below steps:

  • Login to AWS console
  • From services select VPC
  • From VPC Dashboard click on Start VPC Wizard
  • Click on VPC with Public and Private subnets – (assuming that you network will have internet access as well) and click on Select button
  • Enter configuration details as below (assuming your network will be 172.16.4.0/24)
  • Click Next
  • Enter IP firewall outside IP, enter name for gateway and VPN
  • Select routing type as static
  • Enter your office network IP prefix
  • Assuming that you AWS Private subnet will be: 172.16.4.0/24
  • Click on Create VPC
  • After you see the successful creation of you VPC, go to route tables
  • Select the correct route table from the list (associated with 2 subnet)
  • Click on subnet Associations tab
  • Click on Edit
  • Select your subnet and click save button
  • Go to VPN connection link, select your VPN and click on download configuration
  • Open you CISCO ASA firewall
  • Click on Wizard –> IPSec VPN wizard
  • Select site-to-site VPN, VPN tunnel interface as outside and click next
  • Enter the IP address that you have in the downloaded file – as tunnel-group
  • Enter the pre-shared-key that they have provided
  • Click next
  • Select the configuration as below
  • Select the configuration as below
  • Enter the remote network configuration as below
  • Click next and click finish
  • Follow the same step to configure second tunnel-group that you have on that VPN text file
  • Promote a EC2 instance with your newly create VPC
  • Note the private IP address that is automatically assigned to your new instance
  • Open CLI of you CISCO ASA device, we need to configure SLA monitoring as AWS bring the VPN connection down if it does not see the network traffic on the tunnel. To keep the VPN connection alive all the time we need to configure SLA monitoring in our CISCO device
  • Enter the below command
  • ciscoasa# config t
    ciscoasa(config)# sla monitor 1
    ciscoasa(config-sla-monitor)# type echo protocol ipIcmpEcho 172.16.8.4 interface outside
    ciscoasa(config-sla-monitor-echo)# frequency 5
    ciscoasa(config-sla-monitor-echo)# exit
    ciscoasa(config)# sla monitor schedule 1 life forever start-time now
    ciscoasa(config)# icmp permit any outside
  • Now you need to configure your VPC to accept ICMP connection from internet or your firewall outside IP. To configure this
  • Go to VPC –> Security group
  • Select the security group that is associated with the instance you have created earlier
  • Click on Inbound rules tab
  • Click on Edit
  • Select ALL ICMP and enter you firewall outside interface IP as source
  • Click Save
  • Click on VPN connections link
  • Select your VPN and click on tunnel tab
  • You should see at least one VPN tunnel status is UP (In AWS you can’t make two tunnel up at the same time)

Unable to connect to AWS -RDS from SQL Server Management Studio

After promoting RDS instance this is a common problem that you are not being able to access your DB instance. To resolve this issue follow the below steps.

  1. Go to your AWS console – https://console.aws.amazon.com
  2. From Services click on RDC
  3. Select the instance that you have created and note the security groups name
  4. From services click on VPC
  5. Go to Security Groups
  6. Select the security group that you have noted earlier
  7. Click on Inbound rules
  8. Click on Edit button
  9. Add MSSQL port and source network address (from where you want to connect)
  10. Click save
  11. Now try to connect from your computer, it should work