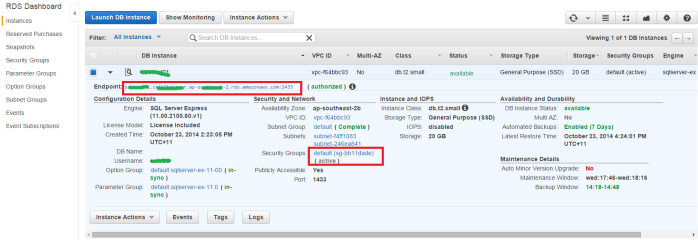
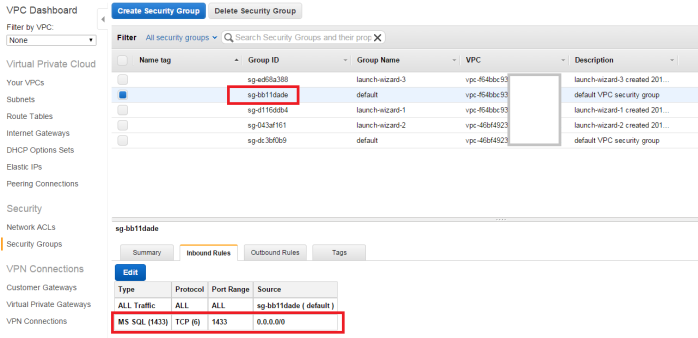
Importing data to ORACLE RDS will be a complex job if you are doing it for the first time. You can follow the below simple steps to do that.
- Create an ORACLE RDS DB instance from AWS management console
- Go to your source database and create a DBlink as below
create database link UR_DB_LINK_NAME connect to UR_RDS_USER_ID identified by UR_RDS_PASSWORD
using ‘(DESCRIPTION=(ADDRESS=(PROTOCOL=TCP)(HOST=UR_IP_RDS_IP_OR_DNS)(PORT=1521))(CONNECT_DATA=(SID=UR_RDS_SID)))’; - Connect to your local ORACLE DB using Oracle SQL Developer
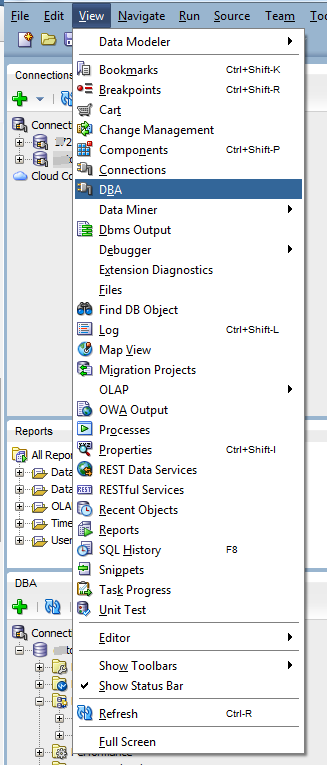
- Click on View menu –> DBA to view the DBA portion to use data pump
- Connect with your source DB with a DBA user
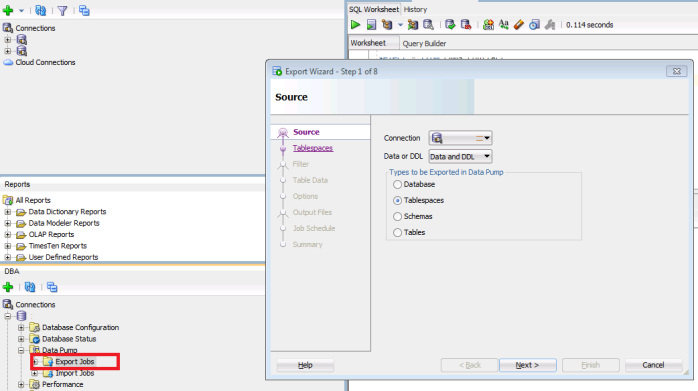
- Expand the data connection –> right click on Export Job and Click on Data pump export wizard
- Select the Tablespaces you want to export and export that to a .dmp file
- Transfer the .dmp file to your RDS by using the below script. Run this script from your source DB’s SQL window
BEGIN
DBMS_FILE_TRANSFER.PUT_FILE(
source_directory_object => ‘UR_SOURCE_DIRECTORY‘,
source_file_name => ‘UR_EXPORT_FILE_NAME.dmp’,
destination_directory_object => ‘DATA_PUMP_DIR’,
destination_file_name => ‘UR_IMPORT_FILE_NAME.dmp’,
destination_database => ‘UR_DB_LINK_NAME‘
);
END;
/
- It will take some time to export this to RDS – based on your file size and network speed
- After successful transfer, connect with the RDS from Oracle SQL developer
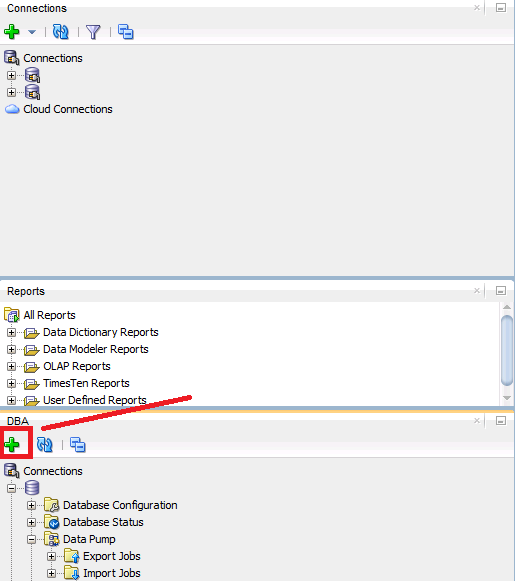
- Add the DBA connection with RDS to initiate data pump wizard
- A tricky part – create tablespace in your RDS with the same name as it was before. It will help you to automatically export those schema, otherwise you will need some manual work map exported tables to you existing RDS tablespace. Use the below script to create those tablespaces:
create tablespace YOUR_SOURCE_TABLESPACE_NAME_DATA
create tablespace YOUR_SOURCE_TABLESPACE_NAME_INDEX
- Use the Data pump import wizard and select the file which you have imported earlier
- Your RDS is ready for service!!

