Where is Shutdown button in Windows Server 2012?

I wonder to see why Microsoft hided so many useful features from its new Server OS- Windows 2012.

If you want to shutdown or restart your server you can follow the below steps in GUI interface. However you can also use PowerShell command to restart (shutdown /r) or shutdown (shutdown /s) your server.
1. Move mouse to the bottom right corner and click on Settings icon

2. Click on power icon

3. Now you can see the Restart and Shutdown option

Microsoft Windows Server 2012-Part 7-DHCP Failover and Backup

Today I am going to talk about some new features of DHCP which were first introduced in WIN 2008 R2 and continued in WIN 2012. The new DHCP service have a very cool failover features and playing with reservation and filtering are really very easy.

Installing DHCP Service

Let’s add the DHCP role first.
1. From the Server Manager click on Add Roles and Features
2. Select Role-based and feature-based installation
3. Select DHCP Server role

4. Click on Add Features

5. Click Install

6. After completing the installation from Server Manager, click on tools menu and click on DHCP
7. To configure the IPv4 Scope right click on IPv4 and Click New Scope

8. Click Next

9. Enter the scope name and click next

10. Enter your network IP range scope and click next

11. Add the exclusion range. You must have printers and server or other network equipments which are using static IP and to avoid assigning those static IP’s you can create an exclusion list so that future IP mismatch will be mitigated.

12. Select the IP lease duration and click next

13. Select Yes, to configure the scope now

14. Enter your default Gateway address and click add. Click Next

15. Specify your DNS server IPs and click next

16. WINS Servers are phasing out in lot of network now a days. It is generally use for NetBIOS name resolution. You can ignore this step and click next.

17. Click Yes, to activate the scope now

18. Click on Finish.

Authorize DHCP Server

DHCP servers provide a useful and intended administrative service. However, when a misconfigured or unauthorized DHCP server is introduced into a network, it can cause problems.
To resolve these issues, DHCP servers running Windows Server 2003 or higher are verified as authorized in Active Directory before they can service clients. This avoids most of the accidental damage caused by running DHCP servers with incorrect configurations or correct configurations on the wrong network it is mendatory to authorize DHCP sever first.
To Authorize this
1. Right click on the DHCP Server and click on Authorize menu

2. Refresh your server and you will find that the icon is green now instead of red, which means, this server is now ready to serve as a DHCP server in your network.

Reservation

Creating DHCP reservation is now easier than ever. Now you don’t need to remember or write that long and boring MAC address to create a reservation entry. You can do this by right clicking on the IP address showing in the Address Leases node and Click on Add to Reservation.

DHCP Backup/Restore

To create a DHCP backup
1. Right click on your DHCP server and click Backup

2. Specify the folder to which you will store the backup data and click on OK

To restore a DHCP backup

DHCP Restore is very handy and it will restore your entire settings including Address Leases.
1. Right click on your newly added DHCP server which is not configured yet and click on Restore.

2. Select your backup folder and click OK

3. Click Yes

4. Click Yes to restart the service. Your DHCP service will be up and running within a few minutes with existing settings

DHCP Failover configuration

Assuming that you have a fully configured DHCP server and you need to create a new DHCP server without creating any scope and authorize that DHCP server.
1. Right click on the DHCP server which is fully configured and click on configure failover

2. Select the Scope

3. Click on Add Server

4. Select the server to which you want to create failover DHCP

5. Click next

6. Specify the load balancing percentage between two servers and click next

6. Click Finish

7. The wizard will notify you after successful configuration

8. Now you can see that the same configuration is replicated to the new DHCP server and it will replicate database with the partner server every time.

How to remove the failover option

To remove failover option
1. Right click on DHCP IPv4 nodes and select properties

2. Go to Failover tab and click on Delete button

3. Click OK to delete

Microsoft Windows Server 2012-Part 5-Active Directory -the WOW things!!

Install Domain Services using PowerShell

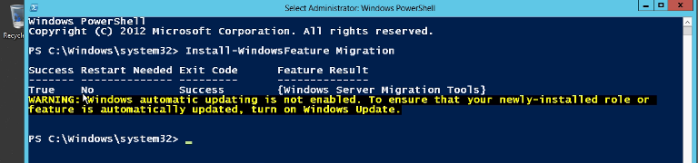
Open PowerShell and execute the below command
Install-WindowsFeature -name AD-Domain-Services

To install Active Directory Forest
install-ADDSForest -domainname “abc.com”


It will prompt you to enter the restore mode password and will do the same prerequisite check which perform by GUI installation also and it will install the domain controller. It will install the DNS and also Group Policy Management Console.

Install from Media

If you are in a large enterprise where thousands of domain controllers exists and the database size is hundred or thousand GB, install from media (IFM) method is the best choice. It will reduce the replication traffic that is initiated during the installation of an additional domain controller in an Active Directory domain. Reducing the replication traffic reduces the time that is necessary to install the additional domain controller.
Later on after installing from media (that could be an external drive, pen drive or DVD), the DC will only synchronizes the difference.

The Ntdsutil is a command-line tool that provides management facilities for Active Directory Domain Services (AD DS). You can use this tool to create installation media for a domain controller. Installation from media does not work across different operating system versions. In other words, you must use a Windows Server 2008 domain controller to generate installation media to use for another Windows Server 2008 domain controller installation.
Type of installation media parameter:

  • Create Full
  • Create RODC
  • Create Sysvol Full
  • Create Sysvol RODC

Sample command
create sysvol full


It will store the necessary files and folders as below

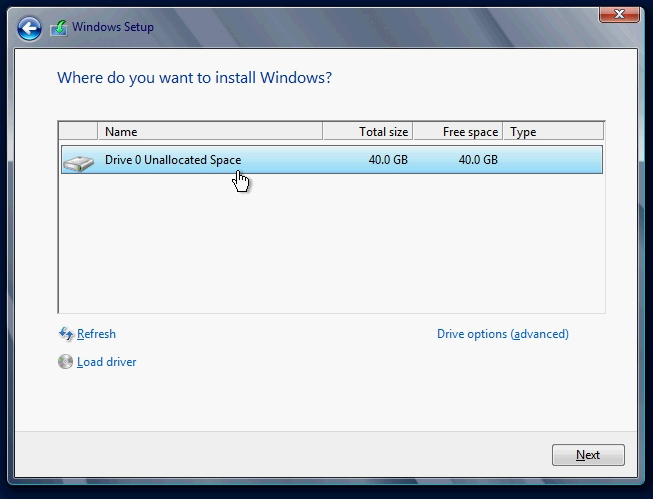
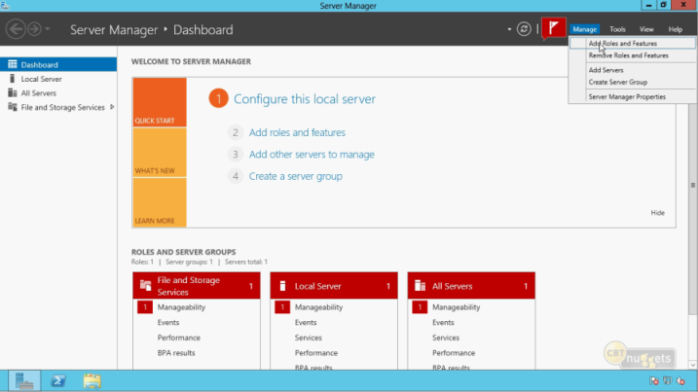
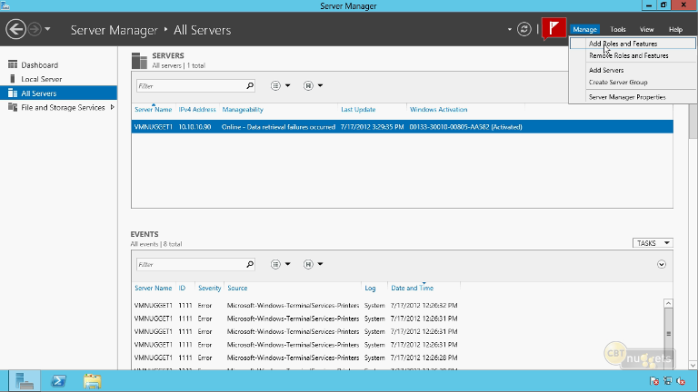
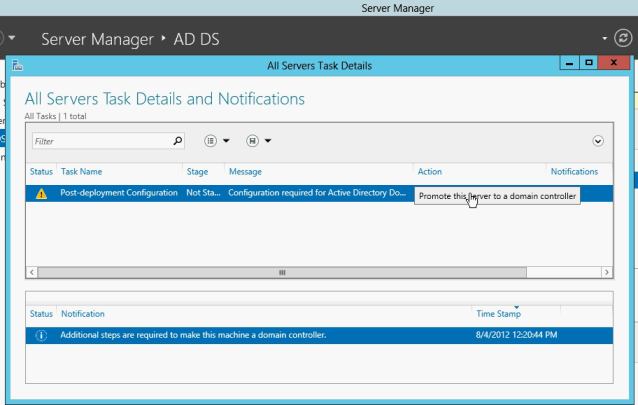
To promote a Server as AD from media, from the Server Manager select the Server and click on Promote this server to a domain controller.

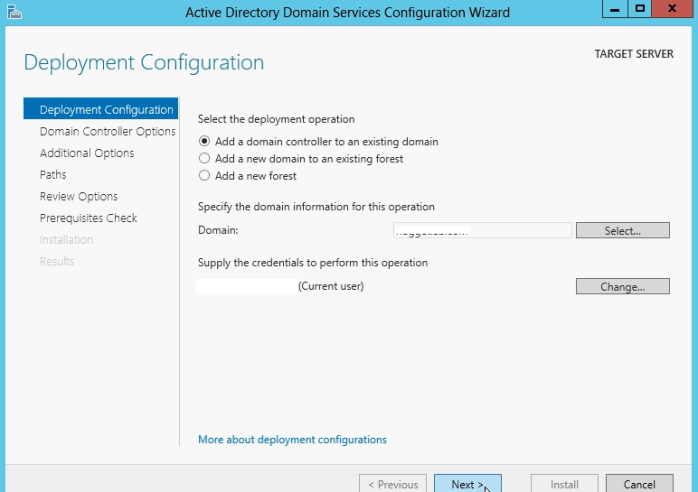
Select Add a Domain Controller to an existing domain option and click next

Select The domain controller options and click next

Click next in DNS options

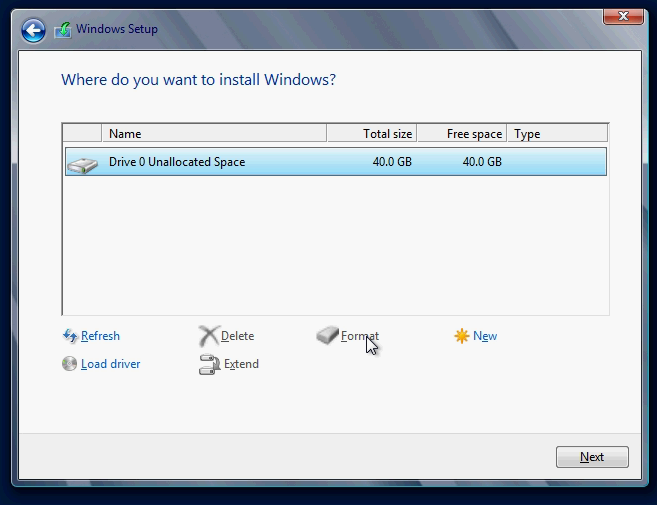
In the Additional Options window check Install from media and select the appropriate path of media and click next

The wizard will now install the domain controller using installation media without connecting to network.

Demote a Domain Controller

To demote a domain controller, from the Server Manager go to Removes roles and features and click next in the wizard
Uncheck Active Directory Domain Services from roles

Click on Remove Features button

Click on Demote this domain controller link

Specify the Credential to execute the command and click next

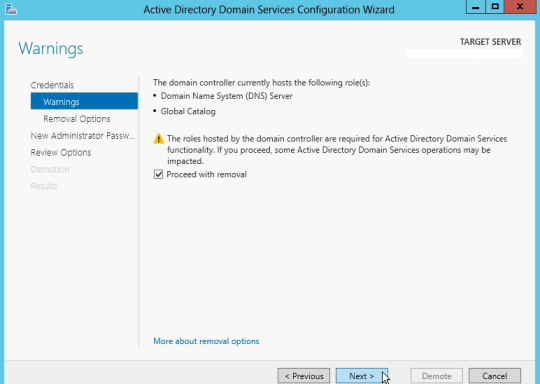
Check Proceed to removal and click next

Check Remove DNS delegation and click next

Enter the new administrator password for your local computer account and click next

Click on Demote button

You can also demote a DC using PowerShell
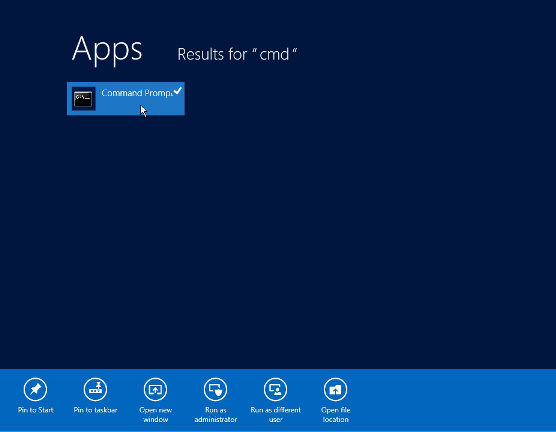
Open command prompt

  • Enter PowerShell
  • Enter uninstall-addsdomaincontroller
  • Enter local administrator password and Press Y to demote this server.

The domain controller which was decommissioned it has to be removed manually from Active Directory Sites and Services. To do this go to Active directory sites and services from Server Manager. Expand your site and right click on that DC which was demoted earlier and click Delete.

Planning an Active Directory Upgrade

Though there is no change in the function level but it is still required to upgrade to the newest forest functional level to upgrade from W2K8 to 2012. Run the below command:
adprep /forestprep
You need to do this only one domain controller in your forest. Because, it will replicate all the changes to all other domain controllers in your network automatically. To execute the forestprep command you need to have installation media and you should be the enterprise Administrator to run this command.
For domain functional level you need to have at least windows server 2003 function level or greater.

To check domain functional level go to Active Directory Users and Computes and Right Click on your domain name and click on Raise domain functional level menu. It will show you the current functional level of your domain.

Upgrade
As I have mentioned in my earlier article, there is no way to upgrade from full GUI to core. You have to use the same mode.

The Global Catalog Service
Before updating you should have some idea about the Global Catalog Services (GC).

  • It is the full copy of host domain objects.
  • There should be at least one GC in a single domain.
  • It will do a partial read-only of other domain in the same forest.
  • It gives you simpler searches across domains.
  • It validates forest objects. For example in case of Universal group membership information, which can contain objects from different domain, Global catalog can validate universal group membership.

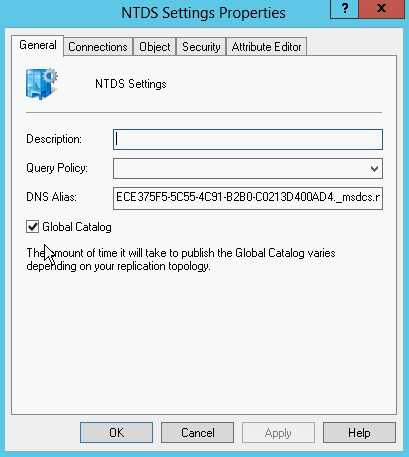
If you want to make a Domain Controller as a Global Catalog go to Active Directory Sites and Services
Expand the domain control and right click on NTDS settings. Check Global Catalog option to make it GC.

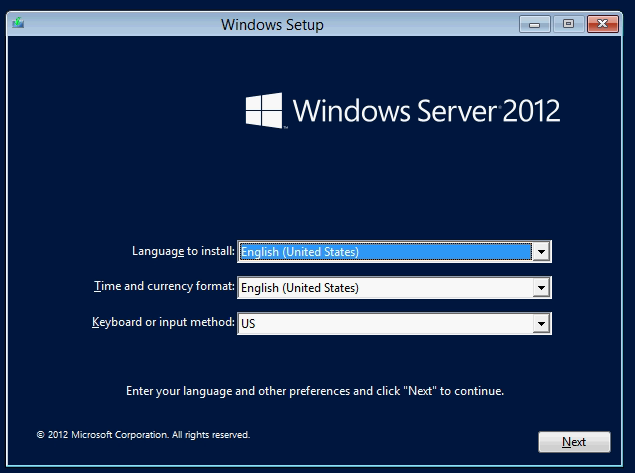
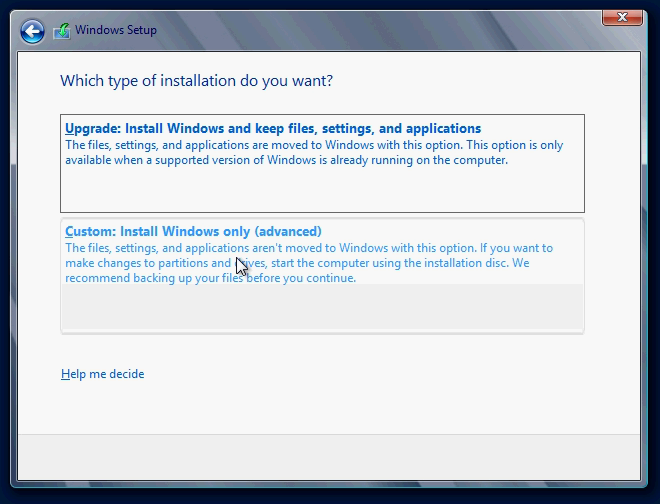
To upgrade a existing Domain Controller insert the Windows 2012 Server OS media and Click on Install Now

Ignore latest update check option. This function actually don’t install the drivers you needed on that server, it will only update whether any known drivers issue fixed by Microsoft.

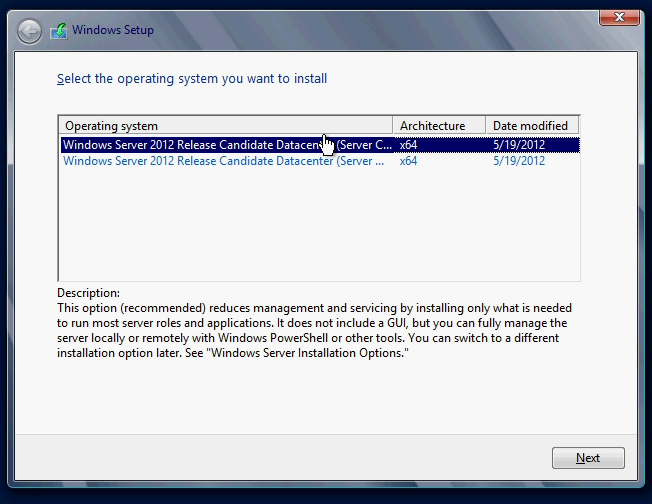
Select the appropriate installation mode

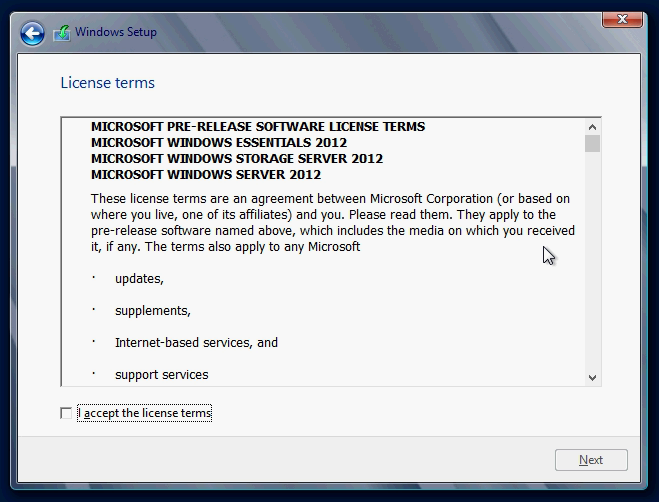
Accept license agreement and click Next and Click on Upgrade

Ignore the warning and click next

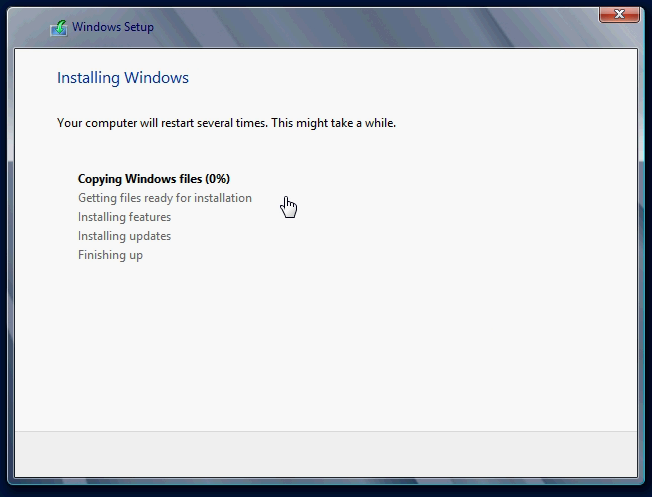
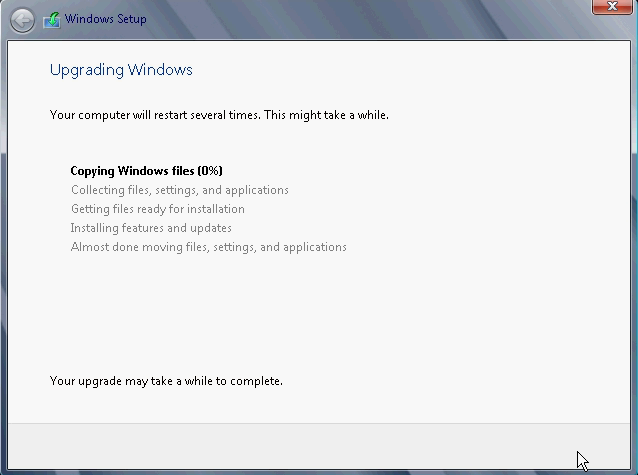
The wizard will start upgrading you existing domain controller (win 2003/2008) to Windows 2012.

DNS SRV Records restore

The DNS SRV (Service Record) entries are critical for proper function of AD. It is a specification of data in the Domain Name System defining the location, i.e. the hostname and port number, of servers for specified services. This records are so important that if you delete any record accidently you domain service will not work properly.
So what can be done if any record deleted accidently?


Please note that, the netdiag /fix will not work anymore in Windows Server 2012 which use to work in the previous versions.

You can use below command which is very handy to restore all SRV records.
nltest /dsregdns

What more things new in AD (I have mentioned few of them in my earlier article also)

  • DCPromo is deprecated, now it is built into UI. ADPrep other prerequisites are now very well handled
  • Active Directory Administrative center has improved UI and have PowerShell history

  • By default Powershell execution is restricted. You can enable it by using Set-ExecutionPolicy cmdlet (http://technet.microsoft.com/en-us/library/ee176961.aspxSet-ExecutionPolicy Unrestricted
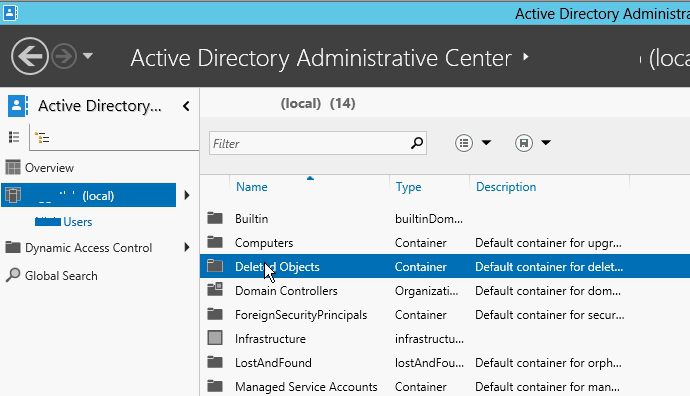
  • Active Directory Recycle bin – will allow you to recover the objects you accidentally deleted. You need to enable that functionality first. For example, to enable Active Directory Recycle Bin for contoso.com, go to Server Manager and Click on Active Directory Module for Windows PowerShell form Tools menu and type the following command, and then press ENTER:

  • Enable-ADOptionalFeature –Identity ‘CN=Recycle Bin Feature,CN=Optional Features,CN=Directory Service,CN=Windows NT,CN=Services,CN=Configuration,DC=contoso,DC=com’ –Scope ForestOrConfigurationSet –Target ‘contoso.com’
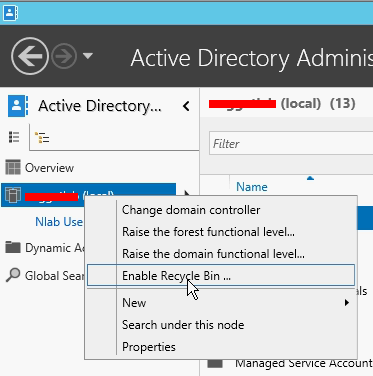
  • You can do this from GUI also. Go to tools –> Active Directory Administrative Center, Right click on your domain and click on Enable Recycle Bin


  • Activation VIA AD – Previously we used key management server to active all the client machines now it can be activated via AD which is much more integrated.
  • Virtualizing DC – In earlier Server OS version there were some issue in VM DC Synchronization which has been improved in Windows 2012 Server.
  • UI for Fine-Grained password policy – Now you can have separate password policy (In-term of length, complexity) within the same single domain and the UI to create policy is very cool.

Microsoft Windows Server 2012-Installing and Configuring Servers – Part1


I decided to post a series of article about Windows Server 2012 and this is the Part 1. In this part I’ll talk about the basic installation issue, how to prepare for installation and so on.

Planning installation and roles

It is recommended to practice in virtual machine and test all software whether they have any bugs or they are running properly in VM before deploying Windows Server 2012 in production environment. Lots of products like VMWare, Hyper-V or any other third-party software can be used to test this OS in VM. If you plan in advance, it will make your whole experience better.

Prepare hardware

To prepare hardware I do recommended to use Microsoft Assessment and Planning toolkit (MAP Toolkit). http://www.microsoft.com/en-us/download/details.aspx?id=7826
It is a powerful inventory tool which will assess your environment and recommend which servers can be upgraded or not. This tool will provide a very wonderful report in Microsoft word format about your existing environment readiness status and it will also tells you what may will possibly wrong after upgrading.
You can only migrate from

  • Windows Server 2003 SP2/R2 64bit
  • Windows Server 2008 64bit
  • Windows Server 2008 R2
  • You can migration from Physical to Virtual + Virtual to Physical
  • You can only upgrade to same UI language – different language is not possible
  • You cannot upgrade from Windows Server 2008 Core as it does not have .Net framework installed
  • You cannot upgrade from 32bit OS

Minimum Requirement

Windows Server 2012 is surprisingly light. The minimum installation requirements are

  • CPU – 1.4 GHz 64-bit – Yes only 64 bit architecture is supported in WIN 2012
  • RAM – 512 MB
  • Disk Space 32GB

It may be a good time for hardware upgrade because lot of organization are still using 32bit OS and 64bit is the future.
You can also check this link – http://technet.microsoft.com/en-us/library/jj134246.aspx for system requirements.

Drivers – Signed/Unsigned

If you need any driver you can install it during installation process. Microsoft recommend to use only digitally signed driver, however you can also install unsigned drivers by Disable driver signature enforcement feature.

Pre-learn PS CMDLETS

It is recommended to learn some PowerShell command in advance which will help you to manage your Windows 2012 Server more easily.
Sample PowerShell Command which will show your top 10 event logs:
Get-eventlog system 10
Check this link: http://blogs.msdn.com/b/powershell/archive/2012/08/24/introduction-to-cim-cmdlets.aspx

Removed or Deprecated Items in Windows Server 2012

Please watch out for any removed or deprecated items within Windows Server 2012. Their might be a service such as – there are some changes in federation services, clustering which are not exactly the same that were in Windows Server 2008. You may have third party product which depends on those services or feature and they may not work with Windows Server 2012. So you need to beware of that in advance. There is a documentation on technet, please check the below link before upgrading.
http://technet.microsoft.com/en-us/library/hh831568

Backup and have contingency

And finally you should have proper backup system in place so that in case of any failure you can rollback to your earlier state. Don’t just backup periodically also restore it in your test environment – this is a fundamental rule for any backup and restore plan. Make a contingency plan so that in case of any service failure you can transfer that service to other machine.

Installation Levels

You can use several type of installation

  1. Full GUI mode
  2. Core –(Default) The reason behind making it default is most of the time server administrator don’t even go to data center to access those servers rather using remote console to administer servers. And a recent Microsoft report found 90% of the updates come for graphical user interface
  3. Features on demand
  4. Minimal Server interface – it is kind of compromise those who wants to use GUI mode instead of using Core more (Command prompt). But it does not give you internet explorer, control panel and so on.

Installation

Insert the Windows Server 2012 DVD. The system will boot from the DVD and Windows Setup dialog box will appear. Select your preferred language and click next.

Click Install Now

Select which version of OS you want to install (Core or GUI)

Accept the license agreement

Select Custom installation for new/fresh installation

Select the drive you want to use

You can also load driver if needed or you can modify or delete existing drive from this window

Click next and installation will start

After completing the installation the system will restart and Settings Window will appear to set the initial password for your local server Administrator. Click on the Finish button after setting a strong password.

Then you will see the default screen for Sign in

Press Ctrl+Alt+Delete and enter the Administrator password to Sign in

It will load the Server Manager automatically

Where is the Start Menu!!

In the desktop you won’t find any Start menu.

If you click on the lower left portion of your desktop window you will see a hover icon which is actually the Start menu, click on it and you will see the Metro UI.

You can Sign out If you click on the User icon menu

If you want to restart or Shut Down the computer go to desktop and go upper right hand side of the screen

Click on Settings and you will find the option to Shut Down or restart the computer.

Adding roles and features

Go to Server Manager and click on Add role link or click on Manage menu from the top right corner.

Roles or features can also be installed using PowerShell. Right click on the PowerShell icon from desktop and click on Run as Administrator

To install a feature you can execute Install-WindowsFeature command as below

You can also manage roles and feature of all your server in the server group. You can create server group and new server to the group or you can remove any roles or features of a remote server from this UI.

Administrative tools

The Administrative tools are now moved from program files to Server Manager. If you click on the tools menu from the Server Manager you will find all the Administrative tools available on that server.

To run CMD

Got to start menu and type “CMD”, the system will show you the command prompt icon and if you want to run this as Administrator, right click on that icon and select the option to run from the menu.

This is the end of Part 1. Hope to talk about more regarding Microsoft Windows Server 2012 in future.